The Complete Stone Fabrication Process: How Raw Slabs Become Beautiful Countertops
Stone countertop fabrication transforms raw quarried blocks into precision-crafted surfaces through eight distinct phases: explosive or wire-saw quarry extraction, gang saw slicing into 2-3cm slabs, resin treatment filling micro-fissures, digital laser templating capturing sub-millimeter measurements, CNC cutting achieving ±0.05mm positioning accuracy, multi-stage edge polishing through seven grit progressions, quality inspection and sealing, and professional installation with color-matched epoxy seaming—a process spanning three to six weeks from material selection to final walkthrough.
The transformation of raw stone into finished countertops represents a sophisticated convergence of ancient craft and cutting-edge technology. This process demands specialized expertise, equipment, and quality controls at each phase. Understanding this journey reveals why stone countertops command premium pricing and why fabrication timelines extend weeks rather than days.
Professional stone fabrication services combine geological knowledge, industrial processing capabilities, and artisanal finishing skills to create countertops that serve families for generations.
Phase 1: Quarry Extraction—From Mountain to Block
Stone fabrication begins not in a workshop but at quarries where geological formations millions of years old are systematically extracted. The extraction methodology profoundly influences both material quality and environmental impact.
Primary Extraction Methods
Drilling and Blasting: Controlled explosive charges detach large granite blocks from bedrock. Operators drill perimeter holes and insert expansion-based explosives that fracture stone along desired planes without inducing unwanted cracks. This method suits hard granite formations but risks micro-fracturing if improperly executed.
Diamond Wire Sawing: High-tensile steel cables embedded with industrial diamond beads slice through rock masses with 1-2mm cutting precision. Multi-pulley systems maintain optimal tension while continuous water cooling prevents thermal stress. Wire sawing produces cleaner cuts with minimal vibration—particularly valuable for delicate marble formations.
Hydraulic Splitting: For controlled, low-vibration applications near sensitive infrastructure, operators drill holes and insert hydraulic cylinders generating controlled tensile stress along predetermined fracture planes. This method minimizes edge cracking without explosive permits.
Block Processing
Extracted blocks weighing multiple tons and measuring up to 5×2.4 meters undergo initial squaring at quarry sites or processing facilities. Diamond wire saws trim irregular surfaces to create standardized dimensions suitable for transport. Quality inspection at this stage identifies natural fissures, color variations, and mineral composition influencing downstream processing decisions.
Sustainability Considerations
Responsible quarrying practices address water management, dust control, and land reclamation planning. Modern quarries implement closed-loop water systems and develop adaptive reuse plans converting exhausted quarries into nature preserves or recreational spaces. Despite optimization efforts, approximately 51% of gross quarrying becomes waste at extraction—driving ongoing efficiency research.
Phase 2: Block to Slab Transformation
Massive blocks must be sliced into manageable slabs before fabrication. This industrial-scale cutting represents the first critical transformation.
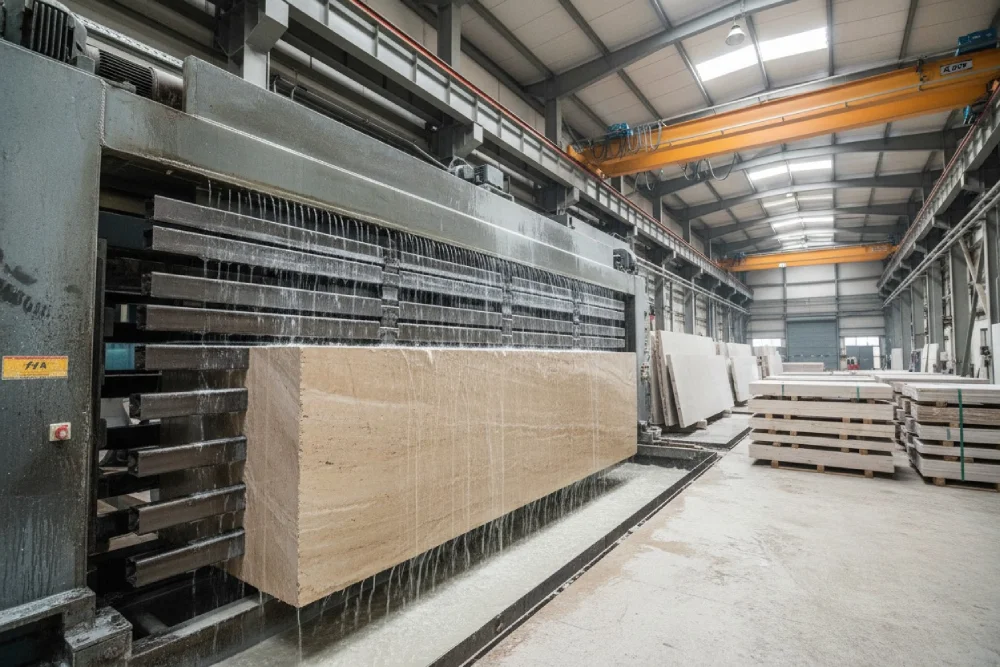
Gang Saw Operations
Gang saws dominate high-volume slab production. These machines mount 50-100 parallel diamond-impregnated steel blades on reciprocating frames oscillating across stone blocks. As blocks elevate, blades penetrate deeper with each pass, slicing masses into uniform 2cm or 3cm slabs.
Gang saws process 25-45 square meters per hour with parameters calibrated for each stone type including feed rates, blade tension, and water cooling flow.
Diamond Wire Slab Cutting
For premium applications, diamond wire saws use 7.2mm diameter wire at optimized speeds achieving 1.5-2.0 square meters per hour. The thinner kerf reduces waste—particularly valuable for expensive stones. Multi-wire systems batch process for higher throughput.
Freshly cut slabs emerge with rough surfaces requiring extensive finishing. Gang saw blades leave saw marks that resin treatment and polishing eliminate.
| Cutting Method | Speed | Best For |
| Gang Saw | 25-45 sq m/hour | High-volume marble production |
| Diamond Wire | 1.5-2.0 sq m/hour | Premium granite, delicate marble |
Phase 3: Resin Treatment and Initial Polishing
Many natural stones contain micro-fissures, pits, and porous surfaces compromising structural integrity and aesthetics. Resin treatment addresses these deficiencies before slabs reach fabrication facilities.
The Resin Application Process
Drying Phase: Slabs must be completely moisture-free. Industrial ovens or 2-3 days in controlled conditions ensure thorough drying.
Surface Preparation: Initial honing opens porous surfaces creating uniform absorption characteristics.
Epoxy Application: Two-component epoxy systems spread across entire surfaces. Long pot life—up to 24 hours—allows deep penetration into micro-fissures before curing.
Curing and Re-application: After 24-hour cure, operators inspect and apply additional resin to newly revealed voids ensuring complete consolidation.
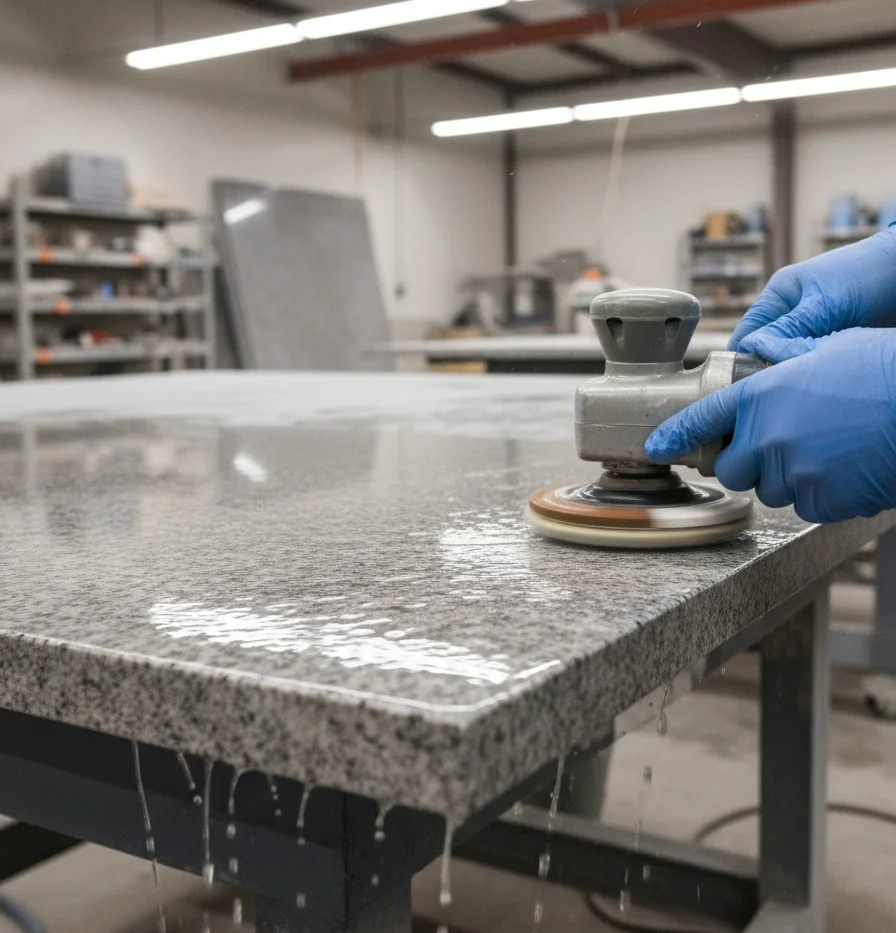
Polishing to Reveal Beauty
Following cure, slabs enter multi-stage polishing lines where rotating abrasive heads progressively refine surfaces from coarse grits (220-400) through final polishing with felt pads—transforming dull stone into gleaming slabs.
Professional Denver countertop installation begins with properly prepared slabs that have undergone complete resin treatment and polishing.
Phase 4: Digital Templating—The Foundation of Precision
Accurate measurement translates customer requirements into fabrication specifications. Template errors cascade through production, causing costly remakes. Modern digital systems have revolutionized this process.
Laser Templating Technology
Digital templating employs laser-based systems capturing sub-millimeter measurements:
LT-2D3D Laser Templator: Industry-standard device rotating nearly 360° while laser beams record precise dimensional data, capturing entire kitchens in minutes.
Leica 3D Disto: Combines laser measurement with camera targeting, automatically capturing coordinates including wall profiles, cabinet outlines, and appliance cutouts.
Template Processing Workflow
Captured measurements export as DXF or DWG files. Programmers overlay templates onto virtual slab images, optimizing layout to minimize waste while maintaining vein continuity, planning seam placement, and positioning cutouts precisely.
Industry standards demand 1/8 inch (3.2mm) tolerances; stringent fabricators target 1/16 inch accuracy ensuring perfect fit.
Phase 5: CNC Fabrication—Precision Meets Automation
Computer Numerical Control technology has transformed stone fabrication from artisanal hand-work to precision manufacturing. Modern CNC systems combine automated consistency with flexibility for complex custom designs.
CNC Technology Architecture
3-Axis CNC Systems: Operating on X, Y, and Z linear planes, these workhorses excel at straight cuts, standard edge profiles, and basic sink cutouts. Positioning accuracy reaches ±0.1mm under normal conditions. They dominate high-volume production where standardized designs allow rapid throughput.
5-Axis CNC Systems: Adding two rotational axes (A and C) enables complex 3D profiling, angled cuts for undermount sinks, curved corners, and intricate architectural details. These systems reduce setup time from 15-30 minutes to 5-10 minutes by eliminating manual repositioning while achieving superior surface finish quality.
The Cutting Process
CNC fabrication follows systematic protocols:
- Program Loading: CAD/CAM software generates toolpath files specifying cutting sequences, tool selection, spindle speeds, and feed rates
- Slab Positioning: Slabs weighing hundreds of pounds are positioned using vacuum pods or pneumatic grippers
- Tool Selection: Diamond finger bits for cutouts, core drills for faucet holes, profiling bits for edge details
- Continuous Water Cooling: High-RPM tooling generates extreme heat requiring constant water flow for cooling, dust suppression, and particle flushing
Sink Cutout Automation
Sink cutouts exemplify CNC advantages over manual methods. Traditional hand fabrication using angle grinders requires 60-120 minutes per cutout with variable results. CNC systems complete identical operations in 15-25 minutes—a 75-80% time reduction—while achieving consistent ±0.05mm precision.
For undermount sinks, CNC systems mill slight inward bevels (typically 1-2mm reveal) allowing sink rims to seat properly against countertop undersides—critical details ensuring waterproof installations.
Material Waste Reduction
Traditional manual fabrication generates 12-15% scrap. CNC systems achieve 3-5% waste rates through optimized nesting algorithms and precision cutting. On premium stones costing $100+ per square foot, this efficiency directly impacts project profitability.
| Process Aspect | Manual Fabrication | CNC Fabrication | Improvement |
| Sink cutout time | 60-120 minutes | 15-25 minutes | 75-80% faster |
| Positioning accuracy | ±2-3mm | ±0.05mm | 40-60x more precise |
| Material waste | 12-15% | 3-5% | 60-75% reduction |
| Setup time | 15-30 minutes | 5-10 minutes | 50-67% faster |
Phase 6: Edge Profiling and Polishing
While CNC systems cut and shape stone, achieving the lustrous finish customers expect requires multi-stage edge polishing—a process combining automated machinery with skilled hand finishing.
Edge Profile Options
Edge design profoundly influences countertop aesthetics:
Eased Edge: Simple 1/8-inch radius softening sharp 90-degree corners. Most economical option suiting modern kitchens and high-traffic family environments.
Bullnose Profiles: Full bullnose features complete semi-circular curves on top and bottom edges—safe for families with children and easy to clean. Half bullnose rounds only the top edge.
Beveled Edge: 45-degree chamfer creating angular definition compatible with both modern and traditional designs. Prevents crumb accumulation while offering visual interest.
Ogee Edge: Elegant S-curve profile—concave flowing into convex—evoking classical architectural styling. Commands premium fabrication pricing due to complexity.
Mitered Edge: Two pieces joined at 45-degree angles creating illusion of thick, monolithic slabs—particularly effective for waterfall islands and contemporary designs.
The Seven-Stage Polishing Sequence
Achieving mirror-finish edges requires systematic progression through increasingly fine abrasives:
- Stage 1 (50 Grit): Removes saw marks and establishes edge geometry
- Stage 2 (100 Grit): Smooths scratches from previous stage
- Stage 3 (200 Grit): Creates uniform smoothness
- Stage 4 (400 Grit): Develops initial luster
- Stage 5 (800 Grit): Produces low-to-medium gloss
- Stage 6 (1500 Grit): Creates high polish and visible shine
- Stage 7 (3000 Grit): Final mirror-finish reflecting light uniformly
Skilled technicians move polishers steadily across edges, maintaining consistent pressure and angle throughout each stage. Rushing or excessive pressure generates heat that can crack stone or prematurely wear diamond pads.
Phase 7: Quality Control and Sealing
Before countertops leave fabrication facilities, rigorous inspection protocols identify defects that might compromise installation or long-term performance.
Multi-Stage Quality Inspection
Professional fabricators implement systematic quality checkpoints:
Dimensional Verification: Specialized measuring tools confirm slab thickness uniformity and overall dimensions match template specifications. Tolerances typically hold to ±1mm for length/width and ±0.5mm for thickness.
Surface Inspection: Visual examination under proper lighting identifies chips, scratches, pits, and dull spots. Gloss meters measure surface finish quality ensuring consistency across production batches.
Edge Quality Assessment: Inspectors verify edge profiles match specifications, checking for chips along vulnerable corners and ensuring uniform polish across entire edge lengths.
Structural Integrity: Light tapping tests identify potential cracks or delamination—particularly important for resin-treated stones. Abnormal sounds indicate internal defects requiring repair or rejection.
Color and Pattern Consistency: For multi-slab projects, adjacent pieces are laid side-by-side verifying acceptable color matching and pattern flow before installation.
Sealing Natural Stone
Granite, marble, and other natural stones contain microscopic pores absorbing liquids and causing staining if left unprotected.
Sealer Chemistry: Penetrating sealers consist of silicone, siloxane, or fluoropolymer resins dissolved in carriers. When applied, carrier liquid penetrates pores then evaporates, leaving resin molecules that clog pathways and repel stains.
Application Protocol: Slabs must be completely clean and dry. Fabricators spread sealer evenly, allowing 3-5 minutes penetration time. Excess sealer is immediately wiped with lint-free cloths. Most applications require two coats with 20-30 minutes dwell time between.
Longevity: Sealer effectiveness varies by stone porosity. Dense granites may remain protected 3-5 years; more porous stones require annual resealing. Engineered quartz requires no sealing due to its non-porous resin matrix.
Comprehensive natural stone supplier services include proper sealing protocols ensuring long-term stain resistance and surface protection.
Phase 8: Professional Installation
Even perfectly fabricated countertops fail if installation lacks precision. Professional installation demands specialized equipment and skilled craftspeople.
Pre-Installation Preparation
Cabinet Leveling: Standards require cabinets level within 1/4 inch. Uneven cabinets cause stress, cracking, and water pooling.
Structural Support: Countertop weight demands robust support with corbels at overhangs preventing sagging.
Site Access: Heavy slabs require clear pathways accommodating dimensions plus maneuvering room.
Transport and Setting
Stone handling requires mechanical equipment only—OSHA prohibits manual lifting. Vacuum suction cups or scissor clamps grip solid areas while multi-person teams coordinate movement using specialized dollies and A-frame carts.
Setting Process: Clear or color-matched epoxy bonds countertops to cabinets. Teams position slabs with micro-adjustments verified by laser levels. Seams receive color-matched epoxy and vacuum seam pullers creating tight joints within 1/16-inch width. After curing, seams are polished to near-invisibility.
| Installation Phase | Key Activities | Quality Standards |
| Pre-installation | Cabinet leveling, structural support | Level within 1/4 inch |
| Transport | Mechanical handling, proper clamping | OSHA compliance |
| Setting | Adhesive, positioning, seaming | 1/16-inch max seam width |
Timeline and Cost Considerations
Understanding fabrication timelines and cost structures enables realistic project planning.
Project Timeline Breakdown
The complete journey typically spans three to six weeks:
- Selection and Ordering (3-7 days): Visiting showrooms, selecting slabs, confirming availability
- Templating (1-2 days): On-site measurement after cabinetry installation completes
- Fabrication (7-14 days): Quartz requires 5-7 days, granite 7-10 days, marble 8-12 days
- Installation (1-2 days): Standard kitchens install in 4-8 hours; complex layouts require longer
Cost Structure Analysis
Total installed costs typically range from $55 to $150+ per square foot:
Material Costs: Entry-level granite starts at $27-50 per square foot; premium exotics reach $90-142. Quartz ranges $37-119. Marble varies most dramatically—$30 to $162.50.
Fabrication Charges: Basic fabrication adds $20-30 per square foot; complex projects command $30-50+. Each sink cutout costs $100-200, faucet holes $25-50 each.
Edge Profiles: Standard eased or bullnose typically included. Ornate profiles like ogee add $15-30 per linear foot.
Installation Labor: Professional installation contributes $10-30 per square foot depending on complexity.
For a standard 45-square-foot kitchen, total investment ranges from $2,475 (entry-level, simple design) to $6,750+ (premium stone, complex features).
Key Takeaways
- Eight distinct phases transform raw stone into countertops including quarry extraction, gang saw slicing, resin treatment, digital templating, CNC fabrication, edge polishing, quality inspection, and professional installation—each requiring specialized expertise and equipment
- CNC technology achieves ±0.05mm positioning accuracy while reducing material waste from 12-15% to 3-5% and cutting sink cutout time from 60-120 minutes to 15-25 minutes compared to manual fabrication methods
- Digital laser templating captures sub-millimeter measurements ensuring perfect fit by eliminating manual measurement errors and enabling instant file transmission to CNC production systems
- Seven-stage edge polishing progressions from 50 grit through 3000 grit create mirror-finish surfaces distinguishing professional fabrication from amateur attempts
- Complete project timelines span three to six weeks with fabrication alone requiring 5-14 days depending on material type (quartz fastest, marble slowest) and design complexity
- Total installed costs range $55-150+ per square foot with material selection representing the largest cost driver, followed by fabrication complexity, edge profile choices, and installation labor
Frequently Asked Questions
How long does stone countertop fabrication take?
Fabrication typically requires 7-14 business days depending on material and complexity. Quartz processes fastest (5-7 days), granite mid-range (7-10 days), and marble longest (8-12 days). Total project timeline spans 3-6 weeks including templating and installation.
What is CNC stone fabrication?
CNC (Computer Numerical Control) fabrication uses computer-controlled machines to cut and shape stone with ±0.05mm precision. The technology dramatically improves accuracy, reduces waste from 15% to 5%, and cuts production time by 75% compared to manual methods.
Why do stone countertops need templating?
Templating captures precise measurements of cabinets, walls, appliances, and obstacles. Digital laser systems achieve 1/16-inch accuracy, ensuring fabricated pieces fit perfectly. Template errors cause costly remakes and project delays.
What’s the difference between natural and engineered stone fabrication?
Natural stone requires resin treatment for micro-fissures and sealing for stain protection. Engineered quartz processes faster (5-7 vs 7-12 days) and requires no sealing due to non-porous composition. Both use similar CNC cutting technology.
How are sink cutouts made in stone countertops?
CNC machines cut sink openings using diamond finger bits following precise CAD specifications. The process takes 15-25 minutes with ±0.05mm accuracy. Undermount sinks require beveled edges allowing proper rim seating against countertop undersides.
Why does stone fabrication cost so much?
Costs reflect sophisticated infrastructure including CNC machinery, laser templating systems, multi-stage polishing equipment, and skilled labor. Material costs range $27-162 per square foot, plus fabrication ($20-50/sq ft) and installation ($10-30/sq ft).
What edge profiles are available for stone countertops?
Common profiles include eased (simple radius), bullnose (rounded), beveled (45-degree chamfer), ogee (S-curve), and mitered (thick appearance). Simple profiles are typically included; ornate options like ogee add $15-30 per linear foot.
Do all stone countertops need sealing?
Natural granite, marble, and quartzite require sealing to prevent staining. Dense granites may need resealing every 3-5 years; porous stones annually. Engineered quartz is non-porous and requires no sealing.
How are seams made invisible in stone countertops?
Professional installers use color-matched two-part epoxy and vacuum seam pullers creating tight joints within 1/16-inch width. After curing, seams are sanded and polished to near-invisibility matching surrounding surface finish.
What happens during stone countertop installation?
Installers level cabinets within 1/4 inch, position slabs using mechanical lifters, apply epoxy adhesive, join seams with vacuum pullers, and polish connections. Standard kitchens install in 4-8 hours followed by cleanup and care instruction walkthrough.
Conclusion
The transformation of raw geological formations into precision-crafted countertops integrates extraction science, industrial engineering, digital technology, and artisanal craftsmanship. Modern fabrication achieves remarkable precision—CNC systems position within 0.05mm tolerances, digital templates capture 1/16-inch accuracy, and seven-stage polishing creates mirror finishes from rough-cut edges.
The $55-150+ per square foot investment encompasses sophisticated infrastructure, advanced equipment, technical expertise, and rigorous quality protocols. The three-to-six-week timeline reflects methodical progression through eight distinct phases—each essential, none rushed without compromising quality. Understanding this comprehensive process reveals why quality countertops command premium pricing and deliver surfaces serving families for generations.Ready to begin your countertop project?
Contact Granite and Marble Designs for expert fabrication and installation services backed by precision technology and skilled craftsmanship.