Complete Guide to Countertop Installation in Denver
Countertop installation in Denver typically takes one day for standard kitchens, but the full project — from initial consultation through template, fabrication, and install — spans two to three weeks. Understanding each phase removes the guesswork, helps you prepare your kitchen, and ensures no surprises on installation day.
If you’re searching for countertop installation Denver services, you’re probably somewhere between “I’ve picked my stone” and “when can someone actually install this?” That gap between choosing a countertop and having it in your kitchen is where most homeowners feel lost. What happens during the template appointment? How long does fabrication take? What do you need to move before the crew arrives? Granite & Marble Designs’ countertop installation services have guided over 4,400 Denver homeowners, contractors, and commercial clients through this exact process since 2007.
This guide walks through every phase of professional countertop installation — the preparation, the timeline, what happens on installation day, and what to do (and avoid) in the first 30 days after your new countertops are in. Whether you’re replacing worn laminate or upgrading a full kitchen, this is what you need to know.
What Does the Countertop Installation Process Look Like Start to Finish?
A typical Denver countertop installation follows five phases: consultation and material selection, digital templating, CNC fabrication, installation day, and post-install inspection. Each phase has specific timelines and homeowner responsibilities, and skipping or rushing any phase creates problems that show up in the finished product.
Most homeowners think “installation” means the day the crew shows up and puts stone on cabinets. That’s actually the final step in a process that starts weeks earlier. Here’s how Granite & Marble Designs structures their StoneDoneRight™ process for Denver countertop installation projects:
Phase 1: Consultation and Material Selection
This is where you visit the showroom, view full slabs (not just samples), select your stone, choose your edge profile, and discuss sink/cooktop cutouts. At GMD’s Pecos Street facility, a design consultant walks you through material options and helps you match stone to your existing cabinets and flooring. A good consultation takes 45 minutes to an hour.
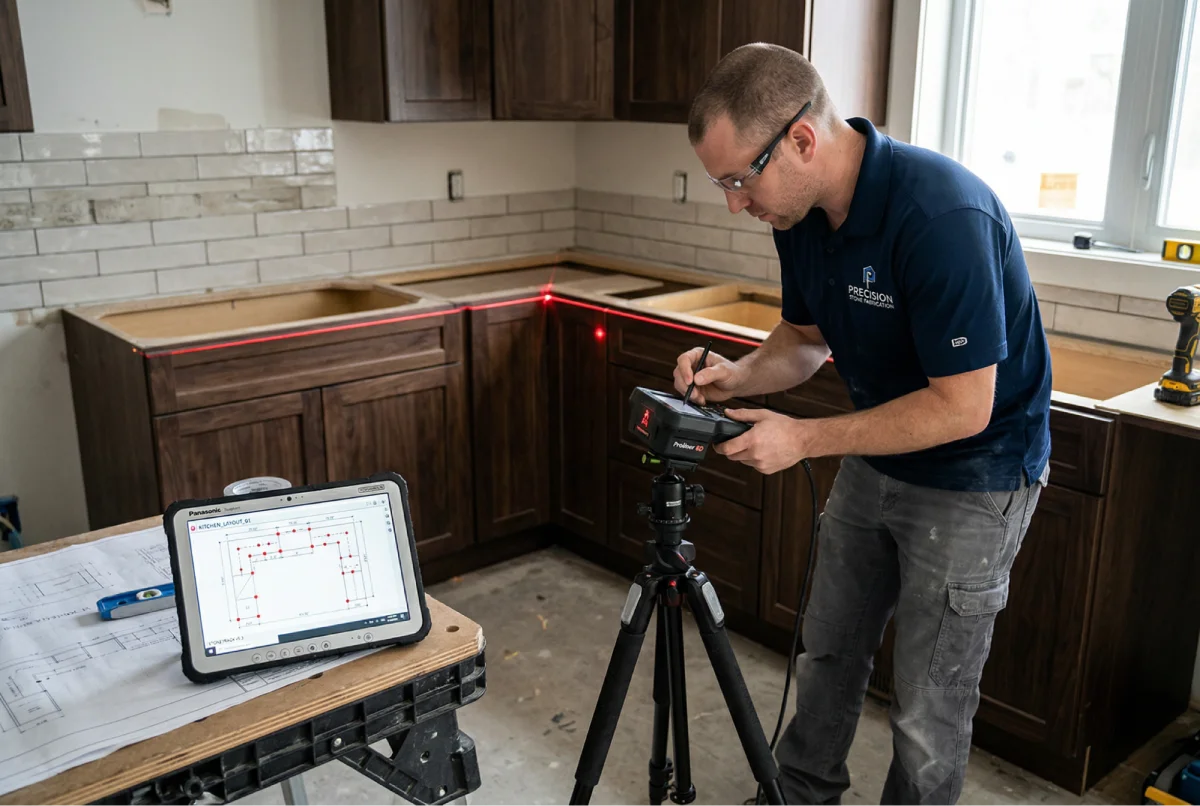
Phase 2: Digital Templating
A technician visits your home to capture exact measurements using a digital laser templating system. This technology creates a precise digital map of your countertop layout — every angle, every cutout, every overhang — accurate to within fractions of a millimeter. The template feeds directly into the CNC fabrication system, eliminating the measurement errors that plague hand-drawn templates.
Phase 3: CNC Fabrication
Your slab is cut, shaped, and polished at the fabrication shop. Edge profiles are routed, sink cutouts are made, and seams are engineered for minimal visibility. This phase typically takes 5 to 10 business days depending on material complexity and current shop volume.
Phase 4: Installation Day
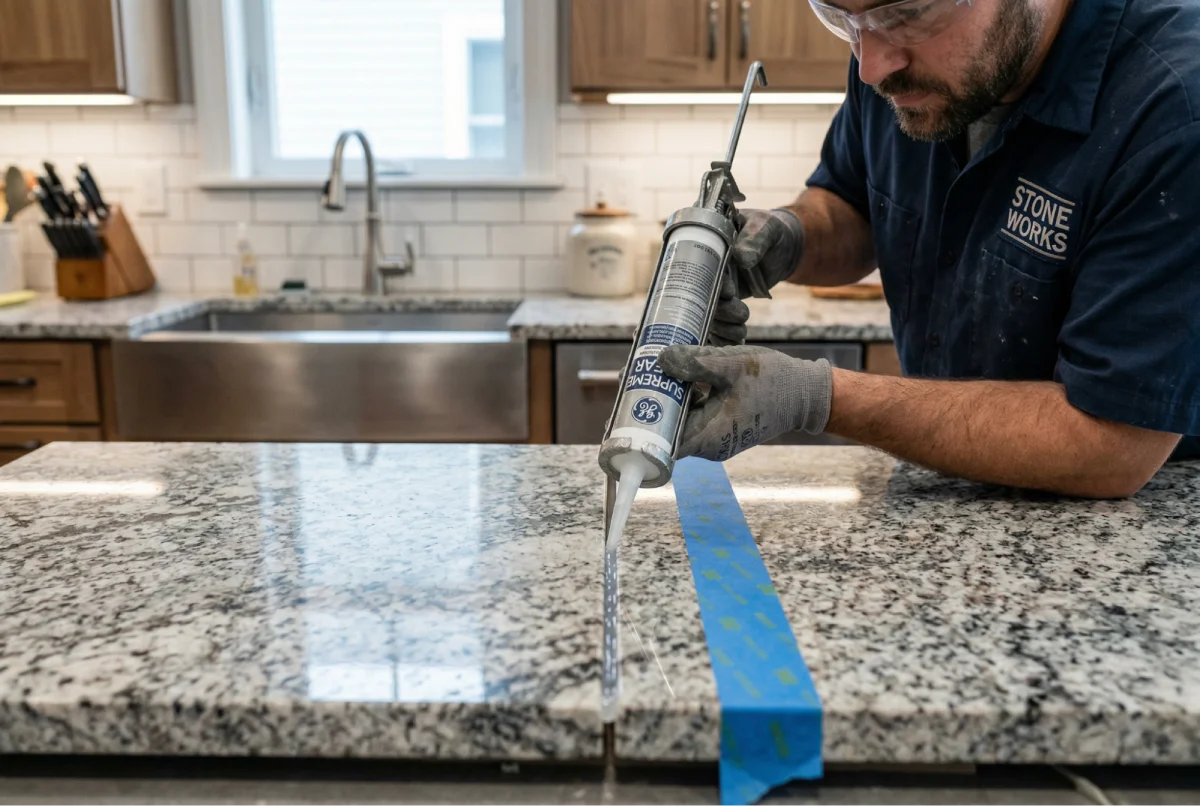
The installation crew arrives with your fabricated countertop pieces, sets them on the cabinets, levels everything, bonds seams, attaches undermount sinks, and applies sealant. A standard kitchen takes 2 to 4 hours. Larger or multi-room projects may take a full day.
Phase 5: Post-Install Inspection
Before the crew leaves, they walk you through the finished installation, check every seam, verify sink alignment, and ensure everything is level. You’ll receive care instructions specific to your stone type.
| Phase | What Happens | Timeline | Homeowner Responsibility |
| Consultation | Material selection, edge choice, project scoping | Day 1 | Bring cabinet/paint samples |
| Templating | Digital laser measurement at your home | 2–5 days after consultation | Clear countertop surfaces, disconnect sink |
| Fabrication | CNC cutting, edge routing, polishing | 5–10 business days | None — this happens at the shop |
| Installation | Placement, leveling, seaming, sealing | 1 day (2–4 hours typical) | Clear kitchen, secure pets, be available |
| Post-Install | Walkthrough, care instructions | Same day as install | Review all surfaces with the crew |
How Should You Prepare Your Kitchen for Installation Day?
Clear everything from your existing countertops and the cabinets below the sink at least 24 hours before your installation appointment. Disconnect plumbing if your installer doesn’t include that service, protect your flooring with drop cloths, and plan to keep the kitchen off-limits during the 2-to-4-hour installation window.
This is the phase where homeowner preparation directly affects installation quality. A crew that has to work around half-empty cabinets, connected plumbing, and cluttered counters loses time and focus. Here’s the checklist GMD provides at every consultation appointment:
- Remove everything from countertops. Small appliances, dish racks, soap dispensers, cutting boards — all of it. The countertop surfaces need to be completely bare.
- Empty under-sink cabinets. The installation crew needs access to disconnect and reconnect plumbing. Cleaning supplies, trash cans, and stored items all need to come out.
- Disconnect the cooktop and sink plumbing. Some countertop installation companies include plumbing disconnection in their scope. Others expect you to hire a plumber separately. GMD coordinates this during the consultation so there are no surprises.
- Protect your floors. Stone slabs are heavy, and installation involves adhesive, dust, and tools. Lay drop cloths or moving blankets over hardwood, tile, or carpeted floors near the work area.
- Secure pets and kids. Installation involves carrying heavy stone pieces through your home. A curious dog or toddler underfoot creates a safety hazard. Keep them in a separate room during the installation window.
- Make sure the crew has clear access. Measure your doorways, hallways, and stairways. Stone slabs are large and heavy — the crew needs a clear path from the truck to the kitchen. If access is tight, let your installer know during the template appointment so they can plan slab sizes accordingly.
A personalized preparation checklist — specific to your project’s scope and layout — is something GMD provides at every consultation. That’s not standard across the industry. Many countertop installers show up on install day assuming the homeowner knew what to do. That assumption leads to delays and frustration.
| Prep Task | When to Complete | Why It Matters |
| Clear countertop surfaces | 24 hours before | Crew needs full access to work surfaces |
| Empty under-sink cabinets | 24 hours before | Plumbing disconnect/reconnect access |
| Disconnect cooktop | Morning of install (or prior) | Gas/electric safety |
| Protect flooring | Morning of install | Prevents scratches from heavy stone |
| Secure pets and children | During installation | Safety around heavy material handling |
| Confirm crew access path | During template appointment | Ensures slabs fit through entry points |
What Can Go Wrong During Installation — and How Do Professionals Prevent It?
The most common countertop installation problems — uneven surfaces, visible seams, cracked slabs, and poor sink alignment — almost always trace back to either inaccurate measurements, rushed fabrication, or inexperienced installers. A fabricator who controls all three phases in-house eliminates the handoff errors that cause these failures.
Here’s the thing: most installation disasters don’t happen on installation day. They happen weeks earlier — during measurement, fabrication, or the handoff between disconnected teams. When a retailer takes your order, outsources fabrication to one shop, and sends a different crew to install, nobody owns the full outcome. That’s where problems sneak in.
Measurement Errors
Hand-drawn templates leave room for human error. A wall that looks straight might bow by half an inch over an 8-foot run. An experienced countertop installation service uses digital laser templating because it captures irregularities that the human eye misses. That data transfers directly to CNC machines, removing the “telephone game” between measurer and fabricator.
Seam Visibility
Seams are unavoidable on most countertop projects — stone slabs have size limits, and L-shaped kitchens require joints. But a visible, mismatched seam signals sloppy fabrication. Expert fabricators engineer seam placement during the layout phase, matching vein direction and color at the joint. They use color-matched epoxy that’s sanded and polished flush with the surface.
Slab Cracking
Stone is heavy and brittle. A slab that’s cut too thin near a sink cutout or handled carelessly during transport can crack. This is why in-house fabrication matters — when the same company that cuts the stone also installs it, they’re accountable for the entire chain. A stone countertop installation company that subcontracts fabrication has no control over cutting quality.
Sink and Cooktop Misalignment
If the sink cutout doesn’t align with the plumbing rough-in, or the cooktop opening doesn’t match the appliance dimensions, you’ve got a problem that’s expensive to fix. Digital templating captures exact appliance measurements and plumbing locations, feeding them into CNC programming so cutouts are precise to the millimeter.
Granite & Marble Designs controls all five phases — consultation, templating, fabrication, installation, and inspection — under one roof at their Denver facility. That’s the StoneDoneRight™ approach. When one team owns the outcome from slab to surface, handoff errors don’t happen.
| Common Problem | Root Cause | Prevention Method |
| Uneven countertop | Poor leveling during install | Shimming and laser-level verification |
| Visible seams | Color mismatch or poor vein alignment | Pre-planned seam layout with color-matched epoxy |
| Cracked slab | Thin cuts near cutouts, rough handling | CNC-controlled cutting with proper support during transport |
| Sink misalignment | Inaccurate measurements | Digital laser templating with appliance specs confirmed |
| Gaps at wall | Wall irregularities not captured | Digital template captures wall bow/irregularities |
| Adhesive failure | Wrong adhesive or insufficient curing | Material-specific adhesive selection with proper cure time |
Key Takeaways
- Takeaway 1: Countertop installation is a multi-phase process — consultation, templating, fabrication, installation, and inspection — each requiring attention to prevent downstream problems.
- Takeaway 2: Digital laser templating eliminates the measurement errors responsible for most installation failures, transferring exact dimensions to CNC fabrication equipment.
- Takeaway 3: Homeowner preparation directly affects installation quality — clear counters, empty under-sink cabinets, and protect floors at least 24 hours before installation day.
- Takeaway 4: In-house fabrication and installation eliminates handoff errors between disconnected subcontractors, reducing the risk of seam problems, cracks, and misalignment.
- Takeaway 5: A standard Denver kitchen countertop installation takes 2 to 4 hours on install day, but the full project from consultation to completion spans 2 to 3 weeks.
- Takeaway 6: The first 30 days after installation require careful use — allow adhesives and sealers to cure fully before placing heavy items or using harsh cleaners.
What Happens After Installation — and What Should You Avoid in the First 30 Days?
After installation, allow 24 hours for adhesives and sealant to cure before using your countertops normally. Avoid placing heavy objects on unsupported overhangs, skip abrasive cleaners for the first month, and don’t sit or stand on your new countertops — stone is strong under compression but can crack under point-load stress at unsupported spans.
The crew is gone. Your kitchen looks incredible. Now what?
The first 30 days are a critical curing period. Seam adhesives and silicone sealant need time to reach full strength. The stone sealer applied during installation needs to bond with the surface before it’s exposed to oils, wine, or cleaning products.
Here’s what GMD recommends for newly installed countertops:
- Wait 24 hours before using the sink or placing items on the countertop. This allows adhesive to cure.
- Clean with mild soap and water only for the first two weeks. No vinegar, no ammonia-based products, no abrasive scrubbers.
- Use trivets and cutting boards from day one. Even heat-resistant granite shouldn’t be tested with a screaming-hot cast iron pan straight from the oven.
- Don’t sit or stand on countertops. This is especially important near sink cutouts and overhangs where the stone is unsupported. Stone handles distributed weight well but can crack under concentrated point-load pressure.
- Check seams weekly for the first month. Minor settling can sometimes open a hairline gap that’s easily fixed if caught early. After the first month, seams stabilize and won’t shift.
After the 30-day curing window, your countertops enter normal maintenance mode. For most materials, that means annual resealing for natural stone and simple wipe-down care for quartz. Your countertop installation company should provide material-specific care instructions — if they don’t, that’s a red flag.
Conclusion
Countertop installation isn’t just about the day a crew puts stone on your cabinets. It’s a multi-phase process that starts with material selection and ends weeks later when your adhesives and sealers are fully cured. Understanding every step — and working with an installer who controls the full process from template to final inspection — is what separates a countertop you love from one that gives you problems.
Ready to start your project? Contact Granite & Marble Designs for a free consultation. With 4,400+ completed projects across Denver and the StoneDoneRight™ approach backing every installation, you’ll know exactly what to expect at every step.
Frequently Asked Questions
How long does countertop installation take in Denver?
Installation day typically takes 2 to 4 hours for a standard kitchen. The full project — consultation through installation — spans 2 to 3 weeks including fabrication time.
Do I need to be home during countertop installation?
Yes. Someone should be present to let the crew in, answer questions about sink and appliance placement, and participate in the post-install walkthrough.
Can new countertops be installed over existing countertops?
In most cases, no. Old countertops need to be removed so the new stone can sit directly on the cabinet framework for proper support and leveling.
How soon can I use my kitchen after countertop installation?
Allow 24 hours for adhesives and sealant to cure before using the sink or placing items on the countertops. Light use can resume after 24 hours.
Does countertop installation include plumbing disconnection?
It depends on the installer. Granite & Marble Designs coordinates plumbing scope during consultation so homeowners know exactly what’s included before installation day.
What’s the difference between a template and a measurement?
A traditional measurement uses a tape measure and hand-drawn sketch. A digital template uses laser technology to capture exact dimensions, wall irregularities, and appliance positions for CNC-precise fabrication.
Do I need a permit for countertop installation in Denver?
Standard countertop replacement typically doesn’t require a permit in Denver. If the project involves plumbing relocation, electrical changes, or structural modifications, permits may be needed.
Can countertops be installed in stages for multi-room projects?
Yes. Multi-room projects are often phased — kitchen first, then bathrooms — to minimize disruption. The key is fabricating all pieces from the same slab lot for color consistency.
How are seams handled during installation?
Seams are engineered during fabrication with color-matched epoxy. On installation day, pieces are dry-fitted, adjusted for alignment, then permanently bonded and polished flush.
What should I look for during the post-installation walkthrough?
Check seam tightness, surface level across the full span, sink alignment, overhang consistency, and that all cutouts match your appliances. Flag anything immediately — it’s easiest to adjust before the crew leaves.